Welcome to this comprehensive guide on string weaving for creating unique and personalized bracelets. In this article, we will delve into the world of string weaving, exploring its history, benefits, and various techniques. Bracelet weaving is not only a creative outlet but also a way to express your individuality through wearable art. So, how to weave string bracelets?
String weaving allows you to create bracelets that are truly one-of-a-kind. By combining different colors, patterns, and designs, you can craft pieces that reflect your personal style and tell your story.
Whether you’re a beginner or an experienced weaver looking for new inspiration, this article will provide you with the knowledge and techniques needed to take your bracelet making skills to the next level.
Key Takeaways
- String weaving is a fun and creative way to make bracelets.
- Different types of string can be used for bracelet weaving, including embroidery floss and hemp cord.
- Essential tools for string weaving include scissors, tape, and a clipboard or knotting board.
- Basic knots used in bracelet weaving include the forward knot and the backward knot.
- Adding beads and charms, creating patterns, and customizing your bracelet are all ways to make your string weaving project unique and personalized.

Introduction to String Weaving
String weaving is an ancient technique that involves interlacing threads or strings together to create intricate patterns and designs. It has been practiced by various cultures throughout history as a form of artistic expression and adornment.
The benefits of string weaving are numerous. Not only does it allow you to create beautiful accessories like bracelets but it also provides a sense of relaxation and mindfulness as you focus on each knot and weave. The repetitive nature of the process can be meditative, allowing you to find peace in the act of creation.
Types of String Used for Bracelet Weaving
When it comes to bracelet weaving, there are several types of strings that can be used depending on your preference and desired outcome.
One popular choice is embroidery floss which comes in a wide range of colors and is readily available at craft stores. It’s affordable, easy to work with, and offers great versatility in terms of color combinations.
Another option is nylon cord which provides durability while maintaining flexibility during the weaving process. This type of string works well for creating more structured designs or incorporating beads into your bracelet.
For those looking for natural materials with an earthy feel, hemp cord or cotton twine may be the perfect choice. These strings offer a rustic charm and can be dyed to achieve different colors.
When choosing the right string for your project, consider factors such as durability, color options, and the overall aesthetic you want to achieve. Experiment with different types of string to find what works best for you.
Essential Tools for String Weaving
![]()
| Tool Name | Description | Price Range | Availability |
|---|---|---|---|
| Shuttle | A handheld tool used to hold and pass the weft thread through the warp threads. | 5-20 | Widely available in craft stores and online. |
| Bobbin Winder | A machine used to wind yarn onto bobbins for use in a shuttle. | 20-50 | Available in craft stores and online. |
| Warping Board | A frame used to measure and create the warp threads for a weaving project. | 50-100 | Available in craft stores and online. |
| Heddle | A device used to separate the warp threads and create a shed for the shuttle to pass through. | 10-30 | Widely available in craft stores and online. |
| Beater | A tool used to push the weft threads into place and create a tight weave. | 10-20 | Widely available in craft stores and online. |
To embark on your string weaving journey, there are a few essential tools that you’ll need in your arsenal.
First and foremost, a good pair of scissors is crucial for cutting your strings to the desired length. Look for sharp scissors with comfortable handles that allow for precise cuts.
A tape measure or ruler will come in handy when measuring out the length of your bracelet or determining spacing between beads and charms.
A beading needle is useful when adding beads or charms into your weaving. It allows you to easily thread them onto the string without tangling or damaging them.
Lastly, a clipboard or bead mat can help keep your work area organized and prevent your strings from slipping around as you weave.
Investing in high-quality tools will not only make the process more enjoyable but also ensure that your finished bracelets have a professional look and feel.
Basic Knots Used in Bracelet Weaving
Now let’s dive into some of the basic knots used in bracelet weaving. These knots form the foundation of many intricate patterns and designs.
The first knot we’ll explore is called the square knot. To create this knot, take two strands of string and cross them over each other. Take one end over both strands at an angle then bring it under both strands through the loop created by crossing over. Repeat this process with the other end by going under both strands at an angle then bringing it over both strands through the loop created by crossing under. Pull tight to secure the knot.
Another commonly used knot is called a half-hitch knot which creates diagonal lines within your weaving. To make this knot, take one strand of string and cross it over. Take the end of the first strand and bring it under both strands then through the loop created by crossing over. Pull tight to secure. Repeat this process with the other end, creating a series of diagonal knots.
Mastering these basic knots is essential for creating intricate patterns and designs in your bracelets. Practice each knot individually before attempting more complex weaving techniques.
Tips for Creating a Consistent Tension in Your Weaving
Consistent tension is crucial in string weaving as it ensures that your bracelet maintains its shape and structure. Inconsistent tension can result in loose or tight sections, distorting the overall appearance of your design.
To achieve consistent tension, start by holding your strings firmly but not too tightly as you weave. Avoid pulling too hard or allowing slack to form between knots.
It’s also important to maintain a steady rhythm while weaving, keeping an even pressure on each knot as you go along. This will help create uniformity throughout your bracelet.
Common mistakes that can lead to inconsistent tension include rushing through the process or pulling too tightly on certain knots while neglecting others. Take your time and pay attention to each knot, ensuring they are all tightened evenly.
Adding Beads and Charms to Your Bracelet
Adding beads and charms can elevate your bracelet weaving by introducing texture, color, and dimension into your designs.
There are countless types of beads and charms available on the market, ranging from glass beads with intricate patterns to metal charms with symbolic meanings. Experiment with different materials and styles to find what resonates with you.
To incorporate beads into your weaving, simply thread them onto one or more strands before tying a knot. You can space them out evenly or cluster them together for a more concentrated effect.
Charms can be attached using jump rings which are small metal rings that open up allowing you to slide the charm onto your bracelet. Once in place, close the jump ring securely to ensure the charm stays in place.
When adding beads and charms, consider how they will interact with your chosen string and overall design. Play around with different combinations to create unique and eye-catching bracelets.
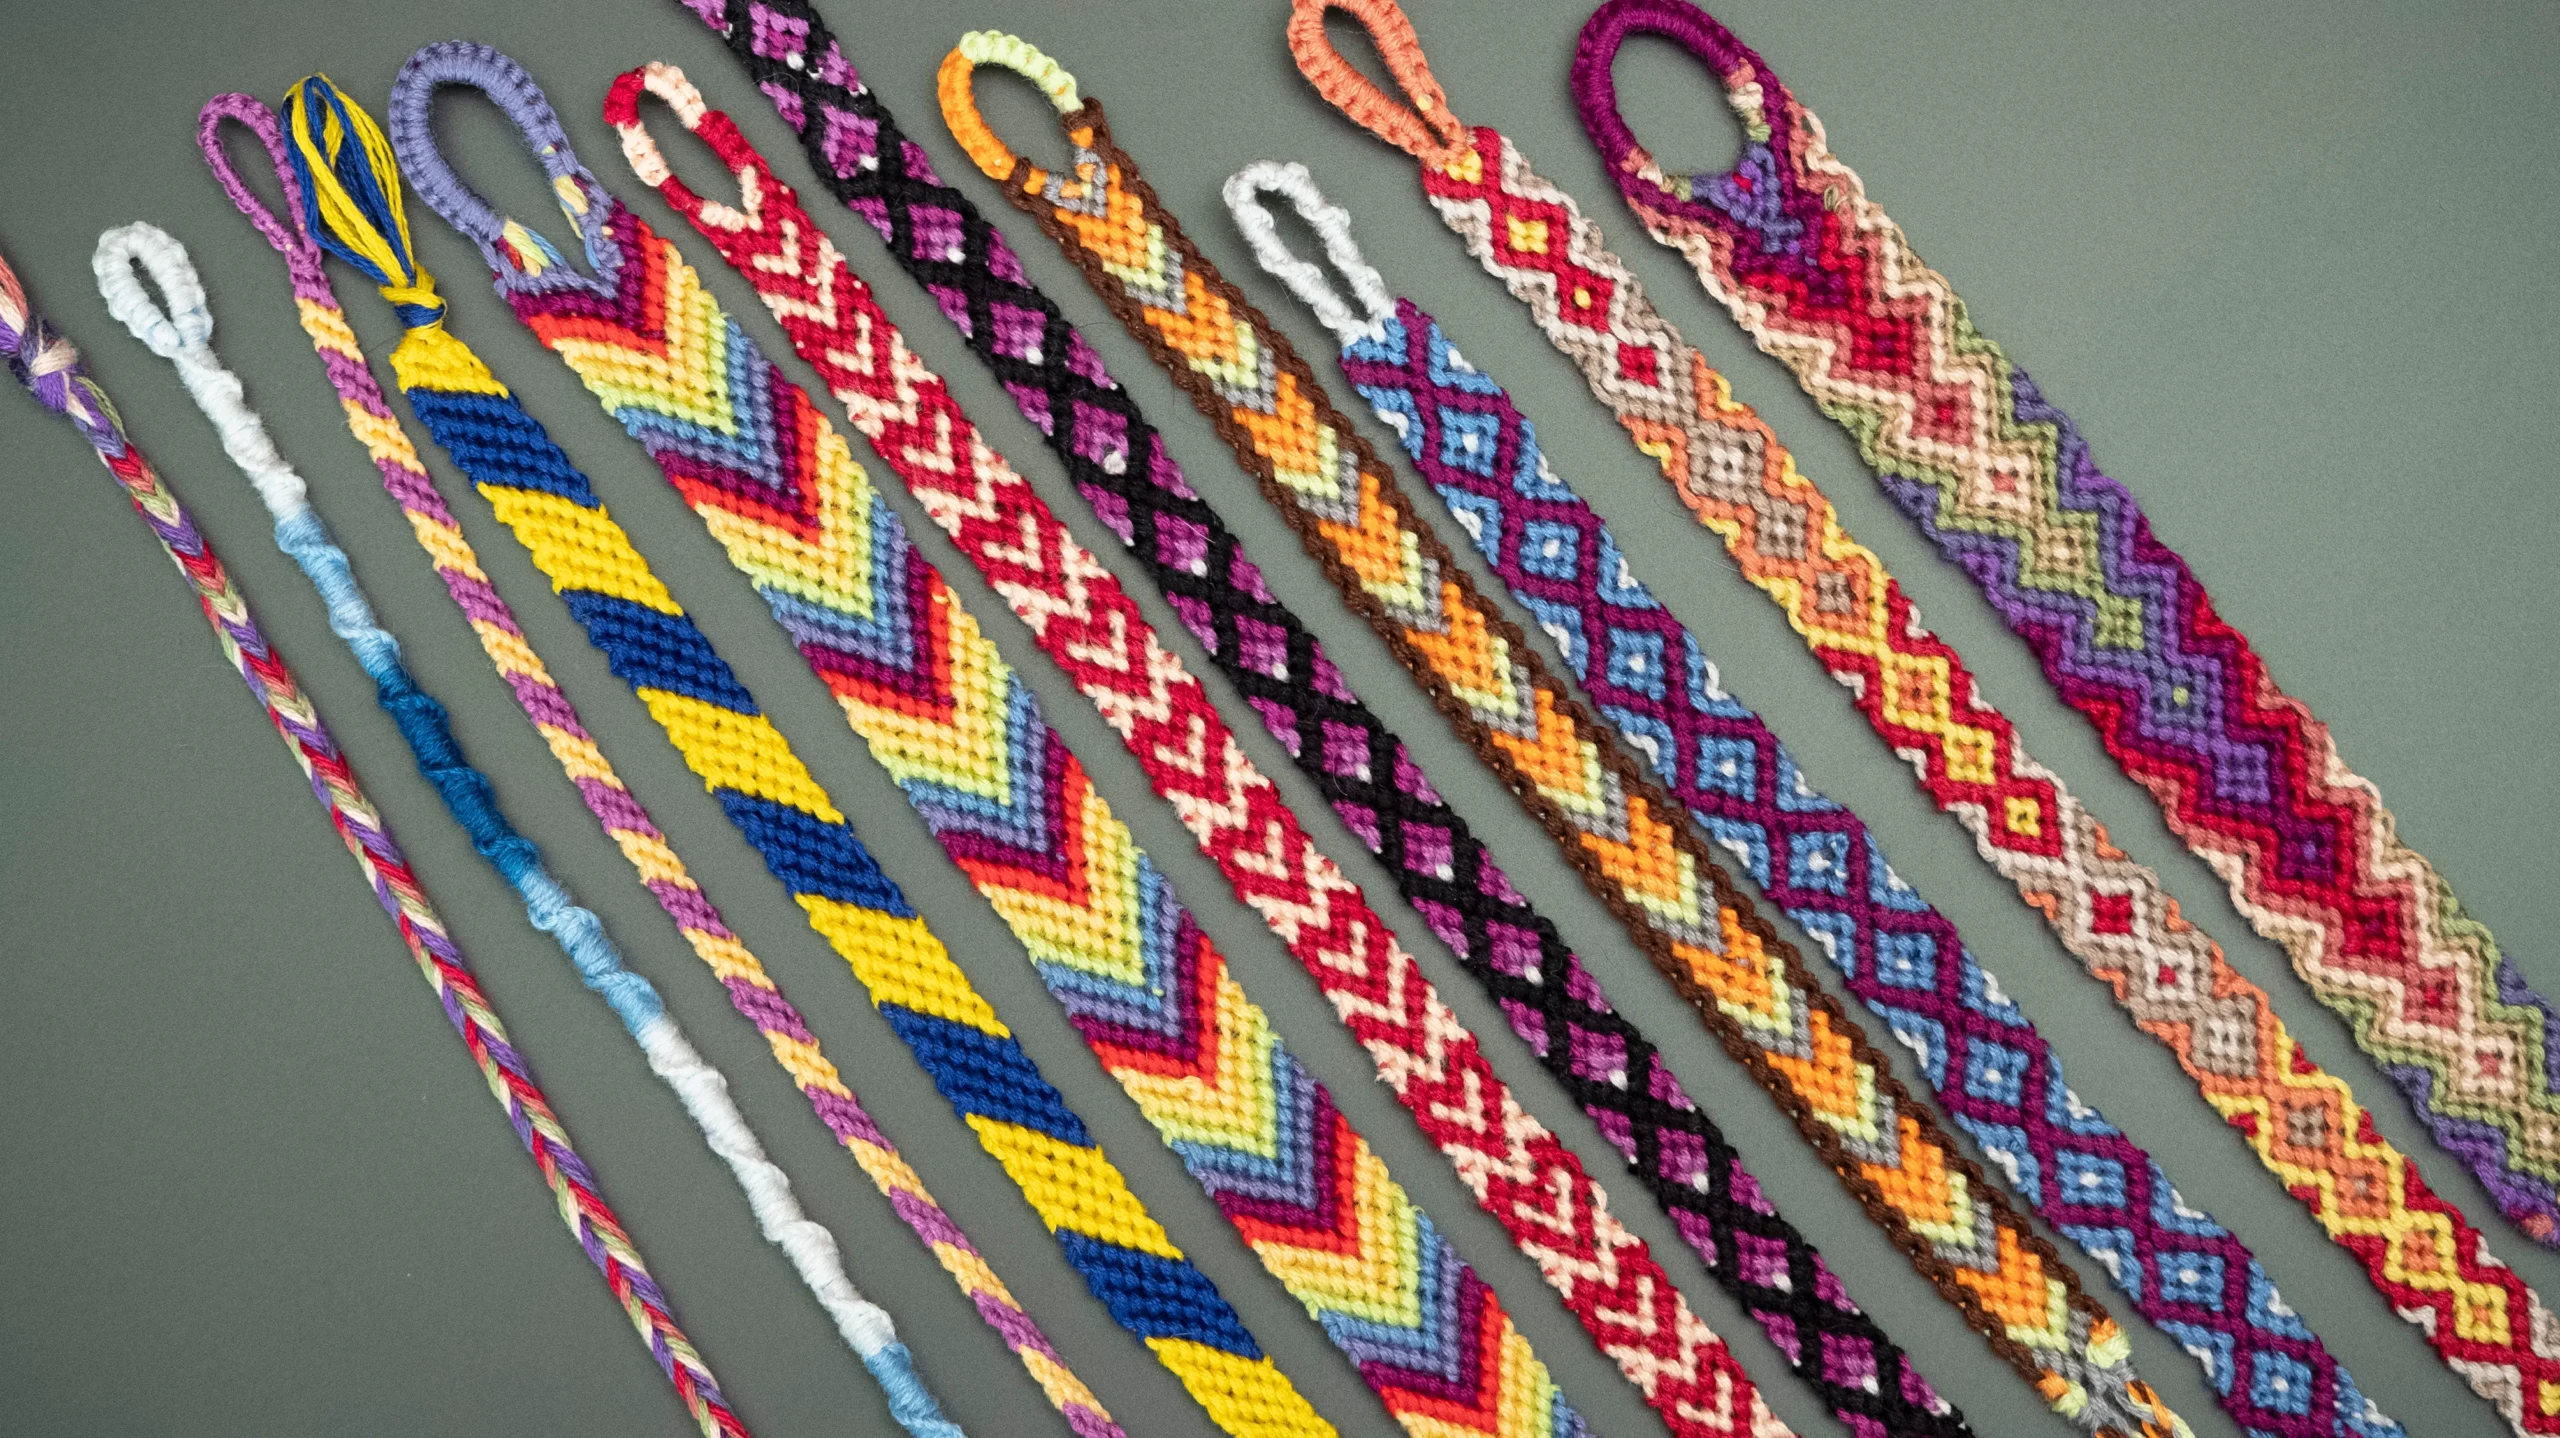
Creating Patterns and Designs with String Weaving
String weaving offers endless possibilities for creating patterns and designs that are as intricate or simple as you desire.
One popular pattern is the chevron design which consists of diagonal lines that form a V-shape. To create this pattern, alternate between square knots in one direction then reverse the process for the next row, forming a zigzag effect.
Another technique is called macrame which involves creating decorative knots using multiple strands of string. Macrame can be used to create intricate patterns such as feathers or flowers within your bracelet.
Experimenting with different knot combinations, color schemes, and spacing will allow you to develop your own unique designs. Don’t be afraid to let your creativity flow and try new things!
Troubleshooting Common Weaving Mistakes
As with any craft, mistakes are bound to happen along the way. However, knowing how to identify and fix these mistakes will save you time and frustration.
One common mistake is accidentally skipping a knot or making an incorrect knot placement which can throw off the entire pattern of your bracelet. If you notice a mistake early on, carefully undo the knots until you reach the point where it went wrong then retrace your steps from there.
Uneven tension is another issue that may arise during weaving resulting in sections that appear loose or tight compared to others. To fix this problem, go back through those sections adjusting each knot until they match the desired tension of the rest of your bracelet.
Preventing mistakes starts with paying attention to detail throughout each step of weaving process. Take breaks if needed so you can approach each knot with focus and precision.
Finishing Techniques for Your Bracelet
Once you’ve completed your bracelet, it’s time to give it a professional-looking finish.
One common finishing technique is using a button closure. To do this, leave enough string at the end of your bracelet to create a loop that will fit around the chosen button. Secure the loop with several knots then sew the button onto the opposite end of your bracelet.
Another option is using a sliding knot closure which allows for adjustable sizing. To create this closure, leave enough string at both ends of your bracelet to tie multiple square knots together. This will form two sliding knots that can be adjusted to fit different wrist sizes.
Experiment with different finishing techniques and closures to find what works best for each individual design and style of bracelet.
Ideas for Customizing Your Bracelet Weaving
Customization is one of the most exciting aspects of string weaving as it allows you to create bracelets that are truly unique and reflective of your personal style.
Consider incorporating different colors into your designs by using strings in various shades or creating ombre effects by transitioning from light to dark tones.
You can also experiment with patterns and designs by combining different knot techniques or adding beads and charms in specific arrangements.
Personalize your bracelets further by incorporating meaningful symbols or initials through charms or embroidery floss patterns.
The possibilities are endless when it comes to customization, so let your imagination run wild!
Conclusion and Inspiration for Your Next String Weaving Project
In conclusion, string weaving offers an incredible opportunity for self-expression through wearable art. By learning various techniques, experimenting with different materials, and customizing designs, you can create bracelets that are not only beautiful but also deeply personal.
I hope this comprehensive guide has inspired you on your string weaving journey! Remember to start with basic knots before progressing into more complex patterns and designs. Don’t be afraid to make mistakes along the way as they often lead to new discoveries and unique creations.
So gather your strings, tools, and creativity, and embark on your next string weaving project. Let the rhythm of the knots guide you as you weave together a piece of art that tells your story. Happy weaving!
FAQs
What is the article about?
The article is about tips and tricks for weaving bracelets with string.
What materials do I need to weave a bracelet?
You will need string, scissors, and a clipboard or tape to hold your work in place.
What types of string can I use?
You can use any type of string, including embroidery floss, hemp, nylon, and cotton.
How do I start weaving a bracelet?
You will need to tie a knot at the end of your string and attach it to your clipboard or tape. Then, you can begin weaving using your desired pattern.
What are some common weaving patterns?
Common weaving patterns include the chevron, diagonal stripe, and spiral.
How do I finish my bracelet?
To finish your bracelet, tie a knot at the end of your string and trim any excess.
What are some tips for weaving a bracelet?
Some tips include using a clipboard or tape to hold your work in place, keeping your tension consistent, and using a needle to help weave in loose ends.
Can I weave bracelets with friends?
Yes, weaving bracelets can be a fun activity to do with friends. You can even create matching bracelets or trade them with each other.
Originally posted 2024-01-05 02:15:28.