How to Sew in a Weave? To sew in a weave, first, section your hair and create cornrows or braids, then place the wefts of hair extensions onto the braids, using a curved weaving needle and thread, sew the wefts onto the braids by stitching through the weft and braid in a continuous pattern, ensuring the wefts are secure but not too tight, and finally, blend your natural hair with the weave using a comb or brush for a seamless look.
If you’re looking to add length, volume, or even a splash of color to your hair, learning how to sew in a weave can be a game-changer. As someone who’s been through the process multiple times, I’m here to guide you through each step, ensuring you can achieve that flawless look with confidence.
Let’s dive into the world of weaves and transform your hair game!
Understanding the Basics of Weave Installation

Types of Weaves
Before we get our hands on the needle and thread, it’s important to understand the different types of weaves available. There are synthetic and human hair weaves, each with their own pros and cons.
Human hair weaves offer a more natural look and are more durable, while synthetic weaves are more affordable but less versatile when it comes to styling. Depending on your budget and style preference, choose the one that suits you best.
Tools and Materials Needed
Gathering the right tools and materials is crucial for a successful weave installation. Here’s what you’ll need:
- Weave hair
- C-curved sewing needle
- Hair thread
- Scissors
- Comb
- Hair clips
- Blow dryer (optional)
Preparing Your Natural Hair
Washing and Conditioning
Start with a clean slate by thoroughly washing and conditioning your natural hair. This ensures that your scalp is clean and your hair is moisturized, reducing the chances of any itchiness or discomfort once the weave is installed.
Drying and Combing
After washing, gently pat your hair dry with a towel and let it air dry completely, or use a blow dryer if you’re short on time. Once dry, comb through to detangle and smooth out your hair, preparing it for braiding.
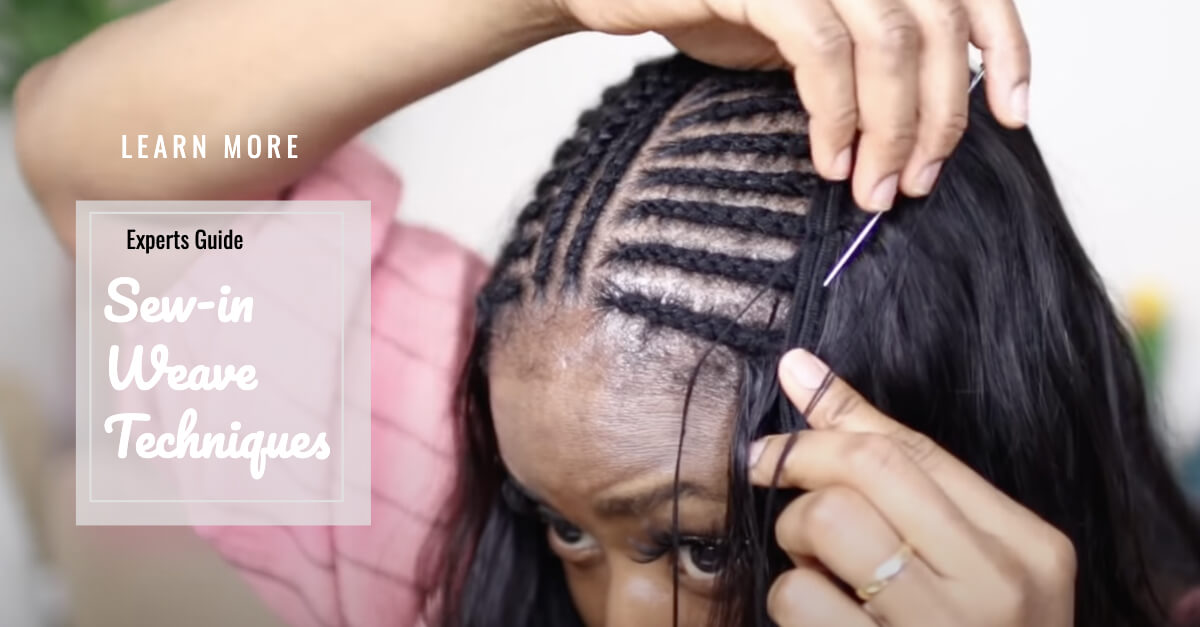
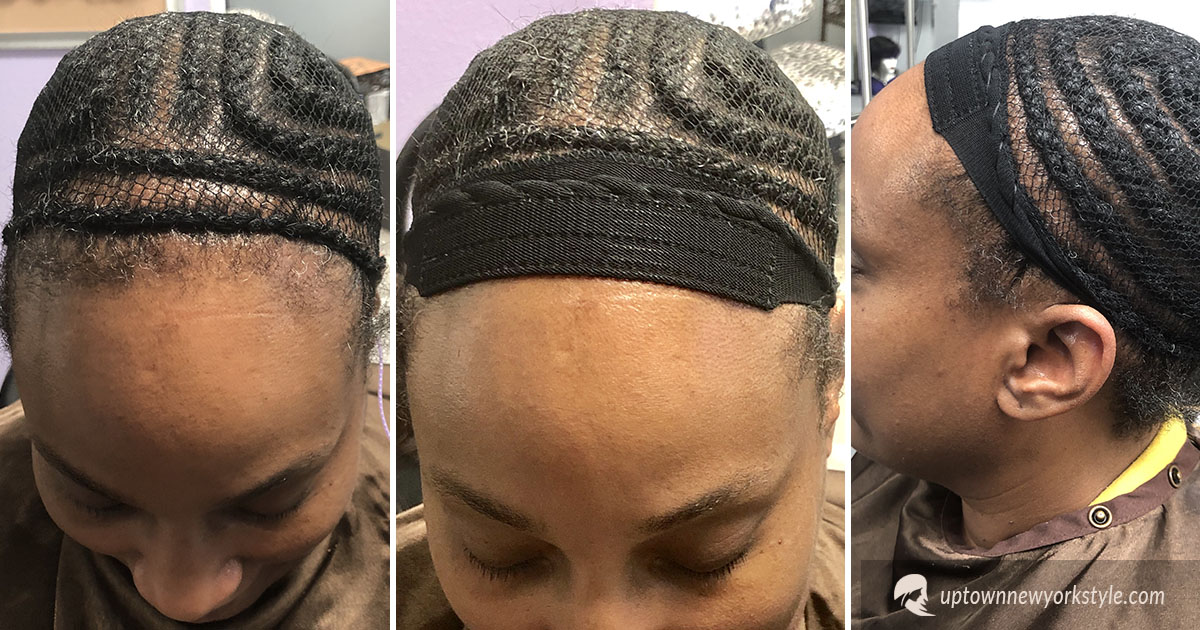
Braiding Your Hair
The foundation for your weave is a set of neat, flat cornrows. The pattern you choose can affect the final look, so decide whether you want a middle part, side part, or no part at all. Keep the braids snug but not too tight to avoid tension on your scalp.
Preparing the Weave
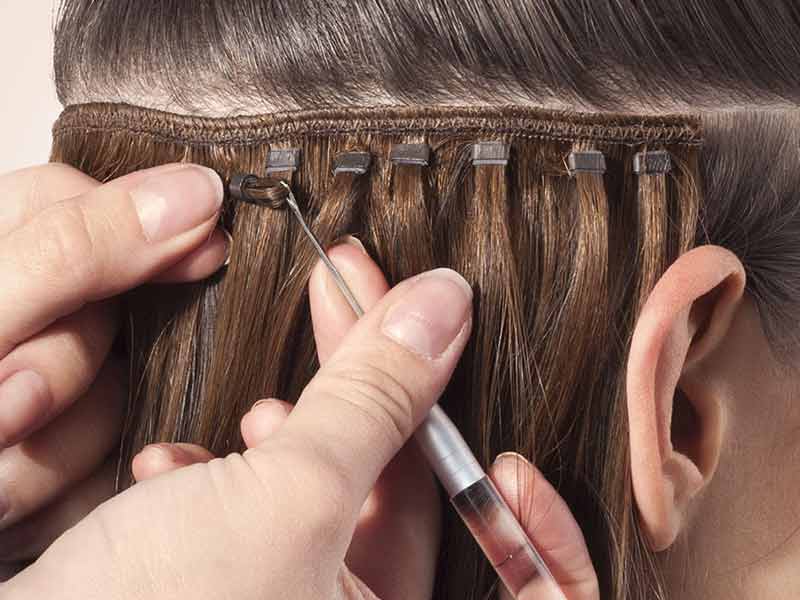
Measuring and Cutting the Weave
Measure the weft against your head where it will be placed, and cut it to the appropriate length. It’s better to cut a little longer than too short—you can always trim it down later.
Choosing the Right Needle and Thread
Select a C-curved needle and strong hair thread that matches the color of your weave. This will make the stitches less noticeable and give a cleaner finish.
Sewing in the Weave
Threading the Needle
Thread your needle with a generous length of thread, and tie a knot at the end. This will be the starting point for securing your weave.
Securing the Weft
Starting from the back, align the weft with your cornrow and secure it by sewing through the weft and under the braid. Make sure the first few stitches are tight to hold the weft in place.
Sewing Technique
Use the over-and-under technique, moving along the weft and cornrow. Keep the stitches neat and consistent for the best hold and a flat appearance.
Attaching Additional Wefts
As you move up the head, attach additional wefts by repeating the same process. Ensure there’s enough space between each weft to prevent bulkiness and to allow for natural movement.
Blending and Styling
Trimming the Weave
Once all wefts are attached, trim any excess length to blend seamlessly with your natural hair. This step is crucial for achieving a realistic look.
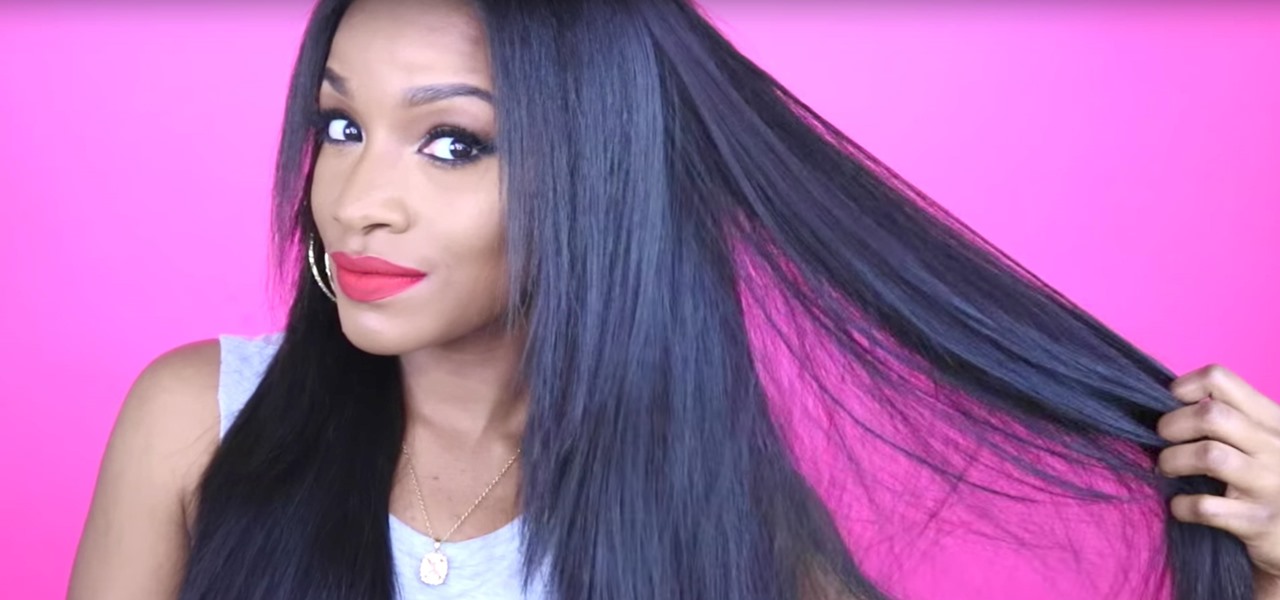
Styling the Weave with Your Natural Hair
Style your weave as desired, using heat tools if necessary. If you have leave-out, make sure to blend it well with the weave for a natural finish.
Maintenance and Care

Regular Washing
Maintain your weave by washing it regularly with a gentle shampoo and conditioner. Be careful not to disturb the cornrows underneath to keep the foundation intact.
Nighttime Care
Protect your weave at night by wrapping it in a silk or satin scarf. This reduces friction and helps maintain the style and luster of the hair.
Removing the Weave

Snipping the Threads Carefully
When it’s time to remove your weave, carefully snip the threads connecting the weft to the cornrows. Be cautious not to cut your natural hair or the braids.
Detangling and Treating Your Natural Hair
After removing the weave, gently detangle and treat your natural hair with a deep conditioning treatment to restore moisture and strength.
Conclusion

Learning how to sew in a weave can open up a world of styling possibilities. With patience and practice, you can achieve professional-looking results at home. Remember to take care of both your weave and natural hair to keep them looking fabulous. Happy weaving!
FAQ
-
How is a weave sewn in?
First things first: Sew-in weaves are a process where your natural hair is braided down into cornrows, says Nash, and a needle and thread are then used to sew down hair extensions onto the braids. With a sew-in, your natural hair is tucked away, so it requires very little upkeep.
-
How long should a sew in weave last?
A healthy sew in cycle is 6-8 weeks depending on growth and home care. We recommend you come in for a maintenance appointment every two weeks for a shampoo and at 4 weeks for a shampoo and tightening. For a lace closure sew in, I suggest getting the closure repositioned at week 3.
-
How do I prepare my hair for a sew in weave?
SO TO KEEP YOUR HAIR HEALTHY, FOLLOW THESE TIPS BEFORE INSTALLING YOUR SEW-IN: 1. Wash Your Hair. Clean hair is the basic starting point for any sew-in weave hairstyle. 2. Protein Treat Your Hair. Hair is comprised of protein, which provides its strength and tensile nature. 3. Trim Your Ends. 4. Wait Two Weeks After Chemical Usage.
-
Do sew in weaves damage your hair?
The weight and tension from sew-in hair can damage hair follicles as it places undue strain on them. This often leads to hair loss around the areas where the weave is fixed to the scalp, and around the hairline.
Originally posted 2023-12-12 08:47:57.