Introduction
Embracing the versatility of Afro-textured hair opens up a world of creative styling options, one of which is learning how to braid hair with weave. This technique not only adds length and volume but also allows for protective styling that can contribute to hair growth and health.
Whether you’re looking to achieve a new look or provide your hair with a break from daily manipulation, mastering the art of braiding with weave is a valuable skill. In this guide, we’ll walk you through the steps from preparation to maintenance, ensuring that your braided hairstyle is both stunning and sustainable.
Before diving into the intricacies of braiding, it’s important to understand the difference between a weave and a braid. A weave typically involves sewing or gluing hair extensions onto natural hair or a cap, while braiding incorporates additional hair into the natural hair using various braiding techniques.
With the right approach and attention to detail, you can create beautiful, long-lasting braids that seamlessly integrate with your natural hair. Let’s begin by preparing the hair and weave for a flawless braiding experience.
Preparing the hair and weave

Detangle the hair
Starting with a smooth canvas is essential for any braiding style, especially when incorporating a weave. Detangling your natural hair thoroughly is a crucial step to prevent any knots or tangles that could complicate the braiding process.
Use a wide-tooth comb or a detangling brush to gently work through your hair, starting from the ends and gradually moving up to the roots. This method minimizes breakage and ensures that your hair is in the best condition to blend with the weave.
Remember to comb the hair in the tract straight back before you begin, as this will set the foundation for neat and even braids.
Once your natural hair is detangled, it’s equally important to prepare the weave. If you’re using synthetic hair, consider lightly spraying it with water to tame any flyaways and make it more manageable.
For those who prefer a specific length, trim the extensions to your desired size before starting the braiding process. Ensuring that both your natural hair and the weave are free from knots will facilitate a smoother braiding experience, resulting in a polished and professional-looking finish.
Prepare the weave
Preparing the weave is just as crucial as prepping your natural hair for a seamless braiding process. Begin by selecting the appropriate type and color of hair extensions that match your hair texture and desired look. If you’re aiming for a natural appearance, it’s essential to choose a weave that closely resembles your hair.
Once you have your extensions ready, it’s time to get them prepped for braiding. If the weave is synthetic, a light mist of water can help manage stray hairs and make the extensions more pliable. For those who plan to use the full length of the extensions, leave them as is; otherwise, cut them to the preferred length before you start braiding.
When the weave is ready, lay out the strands and gently detangle them, just as you did with your natural hair.
This step is vital to avoid any interruptions during the braiding process. Additionally, organizing the hair extensions into manageable sections can save time and ensure that each braid is consistent in thickness and texture.
With your weave prepared and sectioned, you’re now set to move on to the next stage of sectioning your natural hair, where you’ll integrate these extensions to create stunning, voluminous braids.
Sectioning the hair
Divide the hair into sections
With both your natural hair and the weave prepared, the next step is to divide your hair into sections. This is where precision is key; creating small, even sections will ensure that your braids are uniform and aesthetically pleasing.
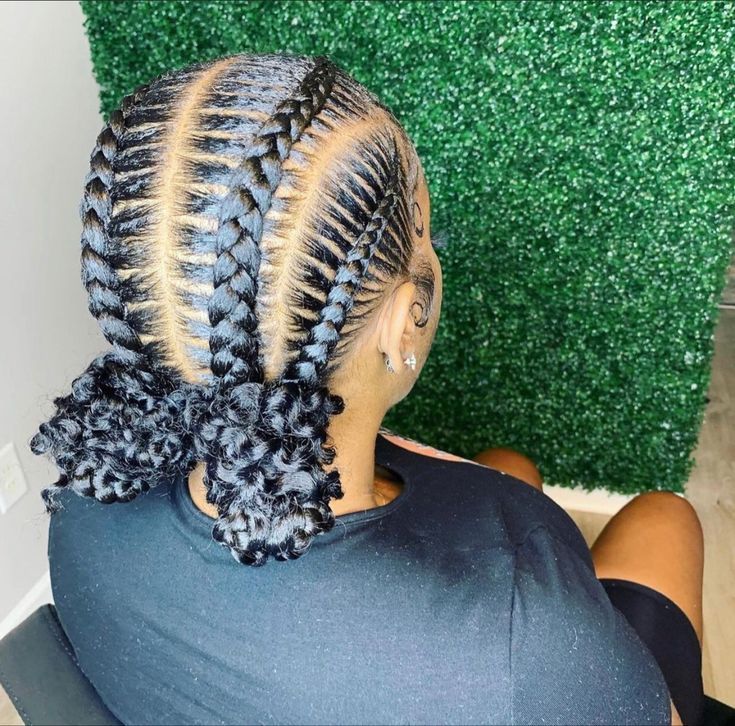
Expert cosmetologist Amber Rose suggests starting by separating your hair into small, box-shaped sections for box braids, using a comb for accuracy. Secure each section with a small elastic to maintain organization and prevent any stray hairs from getting tangled in the braids. This meticulous sectioning is the foundation for a flawless braided hairstyle with weave.
When sectioning for cornrows, create straight, horizontal lines from the scalp to the nape, ensuring that each row is neatly parted. Use rubber bands, clips, or bobby pins to keep the rest of your hair out of the way.
This will help you maintain a clear working area for each cornrow and prevent unwanted hair from being woven into the braid. With your hair neatly divided and secured, you’re now ready to attach the weave and begin the intricate process of braiding your hair with added volume and length.
Secure the weave to the sections
Attaching the weave to your hair is a pivotal step in achieving a professional and long-lasting braided style. For box braids, take a section of the weave and align it with the base of the natural hair section. Fold the weave in half to create two equal lengths and place the midpoint at the root of the section.
This will give you three strands to work with: the natural hair in the center and the two ends of the weave on either side. For cornrows, the process is slightly different. After creating a base braid with your natural hair, you’ll add the weave by stitching small sections or slices into the braid, ensuring it is secure and blends seamlessly with your natural hair.
As you secure the weave, make sure it’s tight enough to stay in place but not so tight that it causes discomfort or tension on the scalp. The goal is to create a stable base that will support the length of the braid without putting undue stress on your natural hair.
With the weave firmly attached to each section, you’re now ready to proceed with the braiding technique, intertwining your natural hair with the extensions to craft a beautifully integrated and voluminous look.
Braiding the hair with weave

Start braiding at the roots
Initiating the braiding process at the roots is crucial for a snug and neat appearance. Begin by positioning your fingers close to the scalp, ensuring that the weave is securely anchored. Start with the strand of hair that lies between the ring and middle fingers, and wrap it around the base of the hair, keeping it tight to the scalp.
As you braid, the position of the strands will shift, with the natural hair moving to the back and the weave strands alternating in the middle and front. This technique lays the groundwork for a tight, secure base braid that will extend seamlessly into the length of the hair.
After establishing a few turns at the base, you can start incorporating additional hair into the braid, adding small amounts from both sides of the section to ensure a uniform and consistent braid.
Continue this process, maintaining a steady rhythm and tension, to blend the natural hair with the weave flawlessly. The result will be a smooth transition from the roots to the ends, creating a cohesive and stylish braided look with added weave.
Continue braiding down the length of the hair
Once the base of the braid is secure and the natural hair is seamlessly integrated with the weave, continue the braiding process down the length of the hair. As you braid, maintain a consistent tension to ensure the braid is neat and uniform. When you reach the point where the natural hair ends, use a bit of hair spray or water to help smooth and combine it with the weave, creating a flawless continuation. This attention to detail will ensure that the braids look natural and hold their shape over time.
Continue braiding until you reach the desired length, then secure the ends with a small hair tie or your preferred method to prevent unraveling. If you’re working with cornrows, repeat these steps for each section, ensuring that each braid is as meticulously crafted as the last. For box braids, after securing the weave to each section, braid each strand to the ends and finish off similarly. This methodical approach to braiding hair with weave not only enhances the overall aesthetic but also promotes longevity of the style.
Finishing the braided style

Secure the ends of the braids
Finalizing your braided style involves securing the ends to prevent any loosening or unraveling of the weave. When you reach the end of the extensions, it’s important to neatly finish off the braid. A small hair tie is often the go-to choice for its simplicity and effectiveness.
For a more natural look, you can also tuck the ends or use a bit of hair glue to ensure they stay in place. This step is essential for maintaining the integrity of your braids and ensuring that your hairstyle remains polished and intact for as long as possible.
Whether you’re crafting cornrows or box braids, the method of securing the ends remains a critical part of the process. For cornrows, ensure that each braid is finished with the same level of care, while for individual braids or twists, each end should be given equal attention.
Remember, the longevity of your braided hairstyle with weave greatly depends on how well the ends are secured, so take the time to do it right and enjoy a beautiful, lasting braided look.
Style the braids as desired
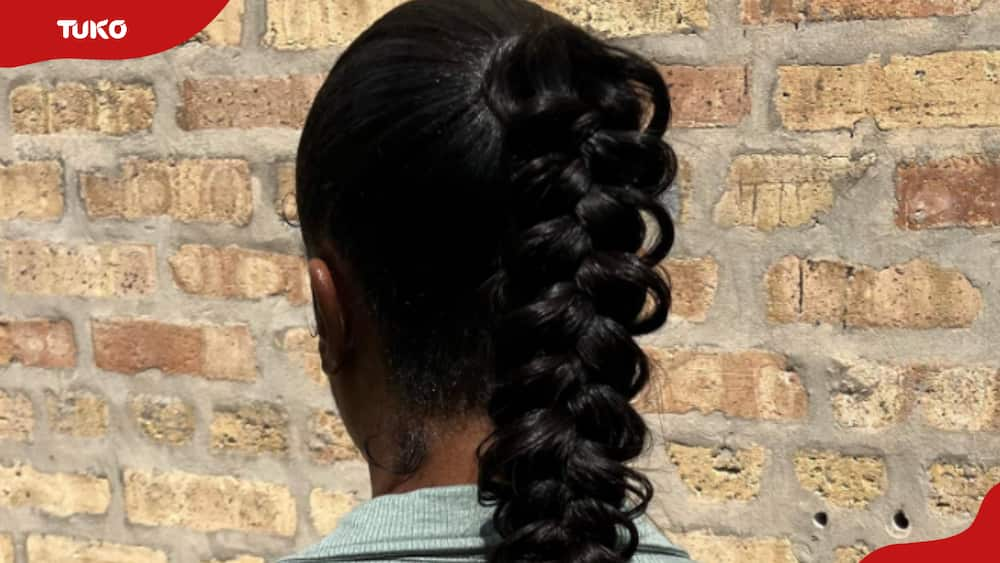
With the braids neatly secured, you now have the creative freedom to style them as you wish. The versatility of braided hair with weave allows for an array of styling options, from elegant updos to playful ponytails. You can accessorize with beads, cuffs, or colorful threads to add a personal touch to your braids, making them a true reflection of your style.
For a more sophisticated look, consider gathering your braids into a sleek bun or twist them into a chic crown braid. The key is to experiment with different styles to find the one that best suits your occasion and personality.
It’s important to handle the braids gently while styling to maintain their integrity. Use the appropriate hair accessories that won’t cause tension or damage to the weave.
If you’re aiming for a more laid-back style, let your braids hang loose, showcasing their length and the skillful blending of your natural hair with the weave.
Whichever style you choose, ensure it complements the braiding technique used and enhances the overall beauty of your woven hairstyle.
Tips for maintaining braided hair with weave
Maintaining your braided hair with weave is crucial for keeping your hairstyle looking fresh and extending its lifespan. To minimize frizz and maintain the neatness of your braids, regularly apply a light oil or braid spray to keep them moisturized.
This not only nourishes the scalp but also adds a healthy sheen to both your natural hair and the weave. Additionally, at night, protect your braids by wearing a silk or satin scarf or bonnet to reduce friction and prevent the braids from getting tangled or matted while you sleep.
When it comes to washing your braids, do so sparingly and with care to avoid causing frizz or loosening the weave.
Use a gentle shampoo and dilute it with water to make it easier to rinse out without disturbing your braids. It’s also advisable to avoid excessive heat styling, as this can damage both your natural hair and the weave. By following these simple maintenance tips, you can enjoy your beautifully braided hairstyle with weave for several weeks, or even months, depending on your hair growth and the care you provide.
Conclusion
In conclusion, mastering how to braid hair with weave opens up a world of styling possibilities, allowing you to express your individuality while protecting your natural hair. By preparing the hair and weave properly, sectioning with precision, and braiding with care, you can achieve a stunning and durable braided look.
Remember to style your braids in a way that suits your personal taste and maintain them with the right products and practices to keep your hair looking impeccable.
Embrace the beauty and versatility of braided hairstyles with weave, and enjoy the confidence it brings to your everyday life.
Whether you’re a seasoned pro or a beginner eager to try new hairstyles, the journey of braiding hair with weave is both rewarding and enjoyable. With patience and practice, you’ll find that your skills improve, and so does the quality of your braids.
Keep experimenting with different braiding techniques and styles, and don’t forget to share your creations and insights with the community, inspiring others to explore the art of braiding with weave.
Sources:
- https://www.tiktok.com/@gabanadahllia/video/7223161343497686318?lang=en
- https://www.quora.com/Whats-the-difference-between-a-weave-and-a-braid
- https://thirstyroots.com/how-to-do-box-braids-with-weave.html
- https://www.quora.com/How-do-I-French-braid-hair-with-a-weave
- https://www.wikihow.com/Braid-Extensions
FAQ
-
What is the best braid pattern for sew in weaves?
Beehive—If you’re going for a full sew-in, a circular braid pattern is probably preferred so that your stylist doesn’t have to sew down the ends of your hair. The beehive is considered the classic circular braiding pattern for those who want a long-lasting, protective style.
Originally posted 2023-08-12 09:09:05.